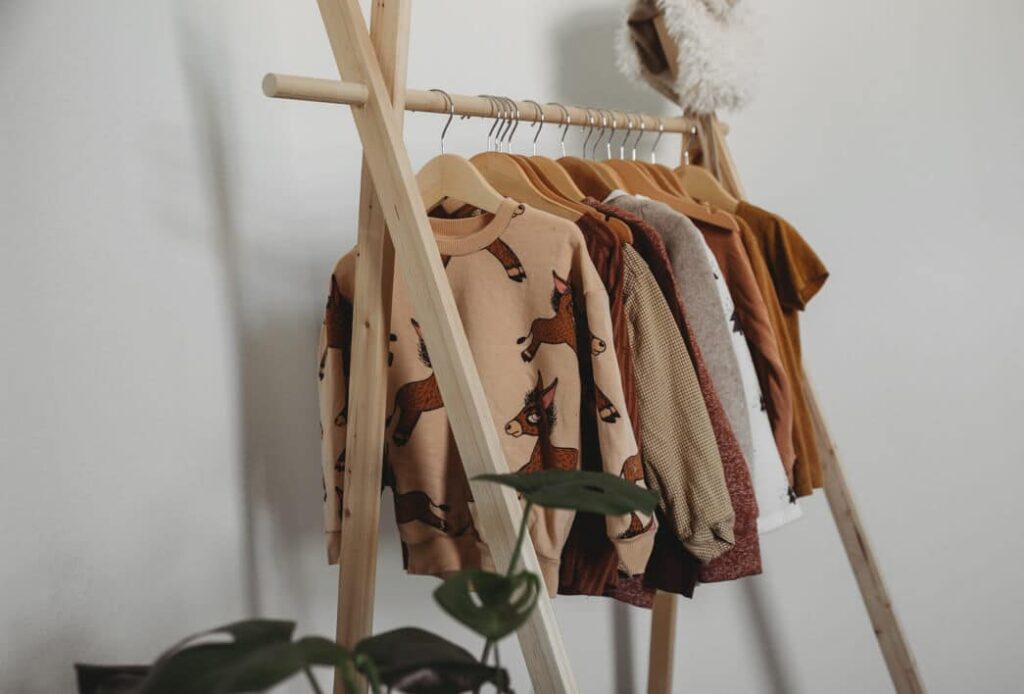
How to display your children’s best clothes
You know how much I love baby and children’s clothes, right? Well, I thought it was a shame that their nice clothes were just sitting in a small, dark closet where no one can see them. So, we decided to make the boys a free-standing wooden clothing rack after seeing one online. My husband is good with wood so he helped me but it’s not hard to make.
Material:
- 1x- power drill with 7/8″ bit
- 4x – wood 1 1/2″ x 3/4″ x 60″ (5 feet)
- 3x- cylindrical wooden dowel 7/8″ diameter x 48″ (4 feet)
- 1x- Optional: 30″ x 44″ of canvas fabric, sewing machine or fabric glue
This is what the wooden pieces look like:
At the store:
At The Home Depot or Lowes, they have these skinny and long pieces of wood in the lumber section that are 1 1/2″ x 3/4″ and about 6 or 8 feet long. Get four of these, and bring them to an employee to cut down to 60″ (5 feet) each.
Also, you’ll need to find the wooden dowels (maybe in the closet section used for hanging clothes), and get three that are 7/8″ diameter. If they’re already 48″ (4 feet) long, great! If not, have an employee cut them to 48″.
You’ll need to get a 7/8″ drill bit of some type (a spade bit is probably cheaper), and a drill if you don’t have one.


Instructions:
- On all four boards, on one of the sides that’s 1 1/2″ wide, measure 9″ from each end and make a dot exactly in the center of the width. Each board will have two dots, 9″ from each end, and 3/4″ from each side (centered), for eight dots total.
- Support the board on something so when you drill through it, the drill bit won’t destroy what’s under the board.
- Slowly drill directly down into and through all eight dots.
- Insert one end of a wooden dowel into the top holes of two boards, and the other end of the same dowel into the top holes of the other two boards.
- Spread each set of boards outward on each side, and connect the bottoms of each pair with another dowel on each side.
Optional canvas:
- Take your piece of canvas and lay it out so the 44″ goes left to right in front you, and the 30″ goes from you and away.
- Fold the 44″ width up and away from you 2″, and sew or glue it down so it creates a pocket that’s 44″ x 2″.
- Repeat on the other side. If applicable, wait for glue to dry.
- Flip the canvas over so the seam is on the underside.
- Remove one side of each of the bottom dowels on your clothing rack, and slide the canvas down the length of each dowel.
- Widen the feet of the rack so the canvas doesn’t sag to the ground, but isn’t completely tight either.


![[DIY] How to make a wooden clothing rack for your toddler 1 rackclothes 1 of 3 1](https://theautismcafe.com/wp-content/uploads/2017/07/rackclothes-1-of-3-1-1024x683.jpg)


2 Comments
kathleen
2017-07-16 at 4:22 PMC’est magnifique !
Davis Miller
2018-03-24 at 9:21 AMI have read the article. You described the article about how to make a clothes racks.Your instruction is cleared. I have like your article. Recently I have tried to make a clothing rack.